GRETSCH WHITE FALCON NECK RE-SET


1800'S C. BRUNO NECK RE-SET

12 STRING GIBSON LES PAUL


DAYNA'S PARLOUR

MCCONVILLE PARLOUR

ACOUSTICS ON ROUTE

BERNABE INSPIRED SOUNDBOARD


DAYNA'S DREADNOUGHT BRACING
Favino Bridge Design
Favino #3
Jacques Favino Gypsy Jazz #1
Creating a
14" Radius for a Fender Strat
https://youtu.be/BhI-YWLFK34
Gibson Les Paul Custom
Hardware swap-out
https://youtu.be/lLFvBwlMY4M
Airline Guitar Fret Correction:
https://youtu.be/P5jWuVyBIG8
Martin Guitar Neck Reset
https://youtu.be/O4QKpKSg15k

Les Paul Fret Dress Video:
https://youtu.be/JMvzBajvD4g

Taylor Guitar Neck Re-Set
Open Air Guitar Repair


Bare Knuckles " Black Hawks "
Viciously good \m/ !!


Epiphone NightHawk


Gibson New School 2009 Thunderbird Bass


Father + Son , guitar bonding at it's best !
Guitar Neck Shaving


I've posted this play by play
on the compensated nut operations
that I go through to fabricate
a compensated nut, A-Z
for this Gibson SG that also
came in for a neck surgery.


Pretty labour intensive, but well worth the effort.


Guitar Tech Workshop
Magnificent Portuguese
12-String


Left handed American
Strat Refret+ Comp nut.

Fret level re-crown and polish
on FreeNote 12-tone fingerboard.
Thank you Stratford and
Southwestern Ontario ! ... for
28 years of faith, trust
and encouragement.


 64' Fender Jazz


This Martin Guitar was in for some loving' this week too !

Fenders / Martins / Gibsons and Taylors


I try my best to remember
to pull out the camera during class .....
but oftentimes things move so quickly ...


Over the course of a week .....
in my home shop
Martin / ( 3 ) Taylors / RainSong / ( 2 ) Normans
came in over the last few days, for fret dresses
compensated nuts and saddles .....
3 wireless systems installed for the
Stratford Festival's production of
the Sound of Music.


Martin nut ledge, ready for a compensated nut.


Prayer meeting, at the
Church of Guitarcheology.

I am SO proud of these guys !
Everyone is "getting it" big time .


Here are a few shots, for
David / Richard / Jody / Charles
4 more TechDeck owners ......
In my own workshop and in the College Classes,
I am continually developing faster / simpler / and safer ways
to "get the job done " ...... below are some new TechDeck manoeuvres,
for the "V" shaped, or unusual shaped guitars.
In this case, I'm cutting compensated nuts on all three of these guitars;
and doing complete a fret dress, as well as setting up the Floyd Rose bridges.

The TechDeck really helps you to make that
"jump to light speed "
in the repair department;
especially when it comes
to handling all of the
wild shaped guitars.


It was kinda' like a breathe of fresh air,
after doing all of
the wild shaped guitars this past week,
when Eric dropped of his Taylor
for a partial refret yesterday ;^ )


Tutorial filming continues ....
White Falcon neck re-set
+ 61 Fender Jazz restoration


A few shots from this past week
Loreena McKennitt's Trouabadour
Lyon+ Healy .....


Tim Weber's Hutnik Myrtle - Top Electric......

3 Rosewood Parlours


Cedar top with spalted maple rosette ...


Loreena McKennitt's
"Story Behind the Songs "
Tour, kicked off in Ottawa.

 Loreena on Vocal / Piano / Harp
Brian Hughes doing his sound-scape
multi-instrumental magic ..
Guitar-Synth / Oud, Bouzouki,
nylon + Steel string acoustic Guitars
This is further complimented, by a wonderfully
passionate Cello / Vocal / Wooden Recorder
( forgive me ... Her name escapes me ... but her music hasn't !! )

Loreena's main-stay, veteran
Jazz guitartist / multi-instrumentalist
Brian Hughes, had the pickup go down on
his A/E steel string ... just as they were
wrapping up rehearsals for this tour.
I've posted a play-by play pictorial for
my College students, on this last
minute " drop what you are doing "
"all hands on deck" guitar rescue lol !!
I'll go over this job in detail as we
kick off Level 2 next week.
Hey Michael,


All of theses guys had covered, or
exceeded, the price of administration;
with the money they have saved on
Guitar Setups and calibration ;^ ).
Patreon access to 300+Videos.
https://www.patreon.com/Guitarchitect


#freeguitarrepairtips


1957 Gibson J-45


The Fall 2014 Session


Remember these ...?
The Fender Starcaster
Here are some more shots after
I finished the Setup / Fret Dress
and Compensated Nut.


Warren is really making some serious progress
on his nylon string Parlour Build.


PRS Pickup Swap

Gibson J-45

Custom Shop Strat


These are 18 shots that were posted at random ,
to give you a basic cross-section,
of some of the more interesting guitars,
that I've worked on, in the past 10 days ...

McConville Maple 12-String Body


McConville Auditorium


Get the Full Video story
https://www.patreon.com/Guitarchitect
Please be as specific as you can about your photo requests;
as I literally have over
20,000 shots ( more with every passing day )
of repair technique photos
/ class photos / TechDeck photos / Neck Surgery /
Bridge slotting jig etc... etc...
Cheers,
Michael


For all who attempt this work;
( Below )
they quickly find out,
that wiring-in the new pickups,
is the smallest part of the job.
The liability is HUGE.
One small scratch on a
customer's guitar ...
and it's Game Over .
These two Schecter
7 String Diamond Series
guitars, were done in tandem,
as I upgraded to
"Bare Knuckles" pickups
from the UK.


The wiring on these two guitars, was identical;
Volume / Volume / Tone ( with splitter )
and a 3-way selector switch.
When spraying the pots, I flip the guitars on their edge
while they are plugged in and tuned, as I
rotate the pots while spraying to get maximum penetration.
Safely manipulating the guitar into
multiple positions, while feeding
wires through, carefully removing
stock pickups, and accessing
both the front and the back
of the guitar at the same time.
All of this is accomplished,
without out ever leaving
even the smallest scratch !
THIS is the biggest challenge.
GK-2 Synth pickup +
9V Battery Cavity
(BSJ /CCJ tutorial) Here are
a couple of unusual
TechDeck manoeuvers ...


When cutting out the 9v battery access cavity
on this Stratfordcaster ....
I strapped the guitar body, in reverse, face-down,
with the neck hanging out over the wider end
of the TechDeck.
I then lifted the body platform and gently
pressed the face of the guitar into the leather padded rails
with the two-footed clamps, while using the aluminum
"BSJ / Cavity -cutting Jig" to make the router cuts.
Att: TechDeckers ....
you can email if you have any
questions about this procedure.
I have organized a "Tour Pack"
TechDeck-in-a-flight-case,
for Pro-Guitar Techs
to take with them on the road....

A Big Thank You goes out to Rick Pietila,
Guitar Tech on tour with Boston ( Tom Sholtz )
at the moment / will be touring with
Peter Frampton in his upcoming tour ....
your heartfelt and very valuable advice
is much appreciated.


The fully loaded TechDeck is a
"Guitar Pro-Shop-in-a-Box",
that has a total dimension of
34"x 18"x 9" when packed up
in our custom designed
flight case.
I don't have a lot of time for detailed posting ..
BUT ... I will continue to ( at least )
post current pictures of the various activities
for your browsing pleasure. If you have
any specific questions, I'll do my best to answer them,
in a timely fashion.
Sincerely,
Michael McConville


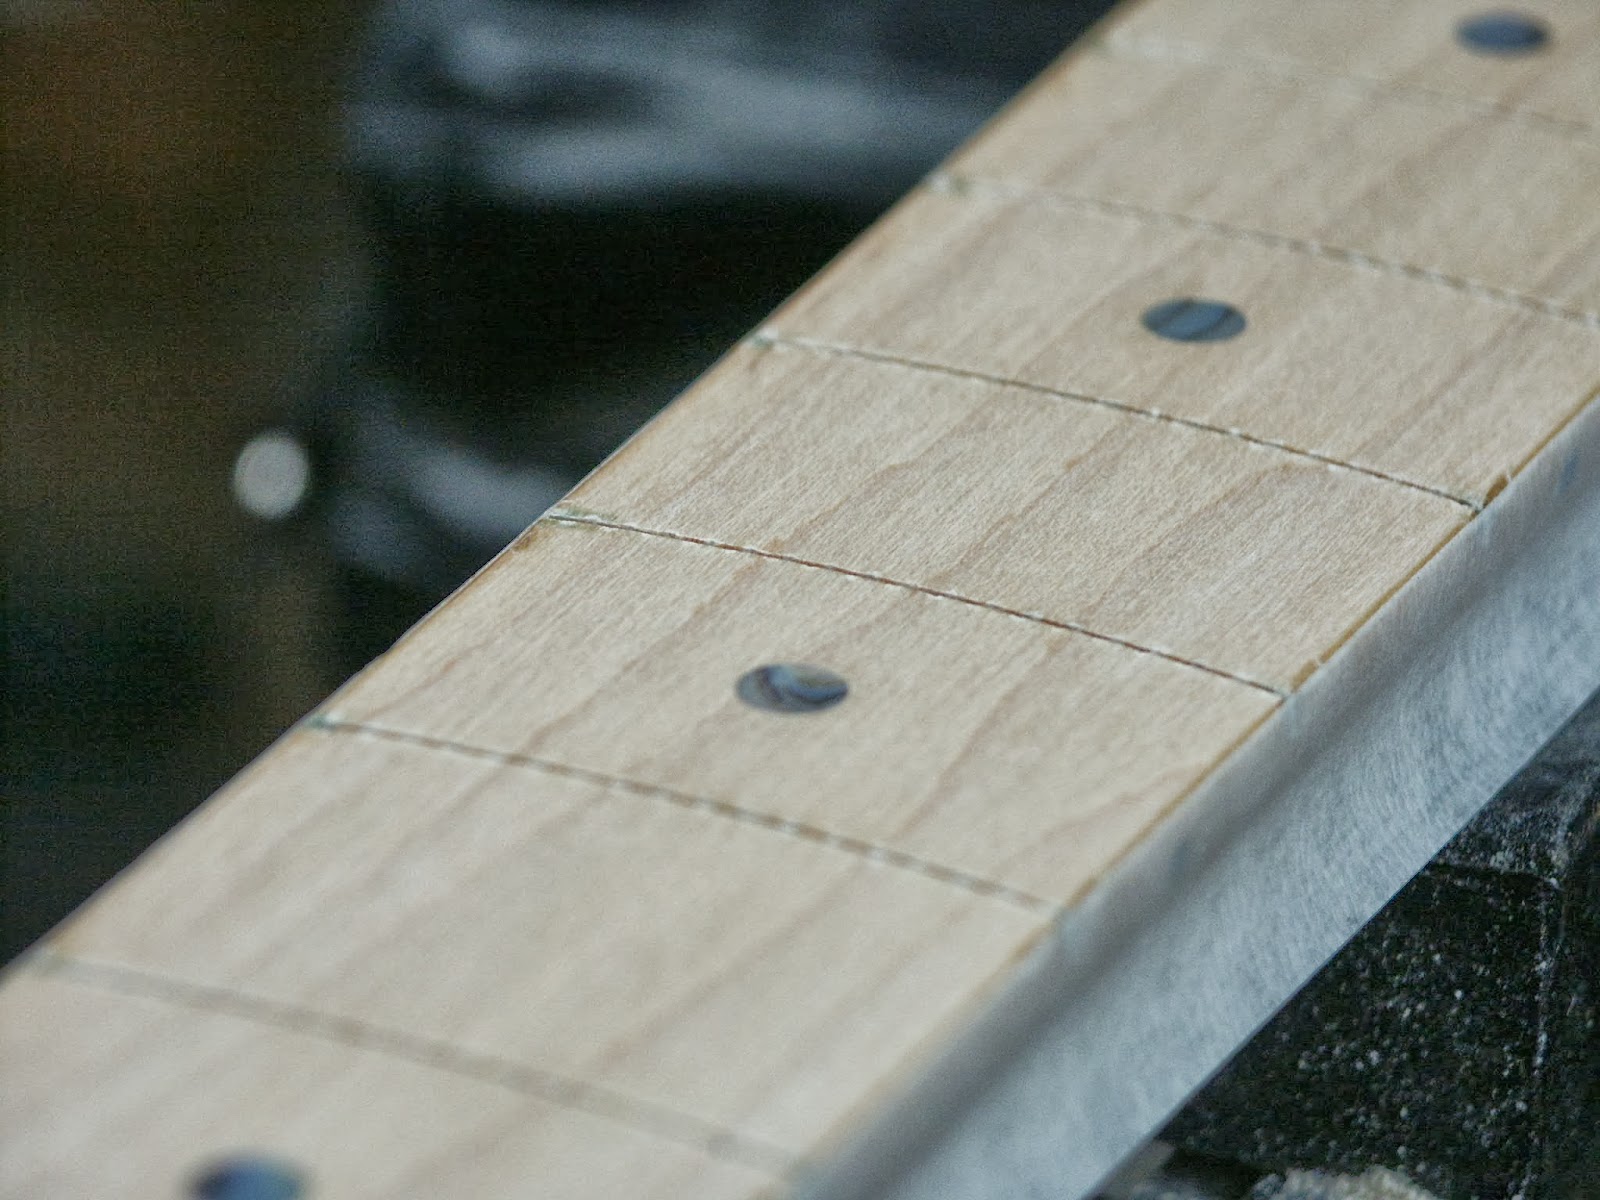
Fender sideways fret removal.


Checking the compound radius ( 9" - 12" )
fingerboard, before fret installation.


R8 Gibson Les Paul refret.

Guitar Neck Shaving

Jay dropped off this guitar,
to have the neck re-shaped
to his own specs.

Ibanez "Steve Lukather" model.


I've posted this play by play
on the compensated nut operations
that I go through to fabricate
a compensated nut, A-Z
for this Gibson SG that also
came in for a neck surgery.


Often times, these nuts come out like
a broken impacted wisdom tooth
lol !!
If you blow this picture up ... you'll
see that I still got it out
right on the glue line
No lumber or chips of lacquer !


Arch Top Guitar Bridge Fabrication
This instrument is in "Mint " condition.
This was a total "kid's glove"restoration.
The instrument was handled
( as always ) with extreme care . The only
material that came into contact with all of the
the guitar surfaces during this restoration, was
genuine leather ..... neck straps / body straps
splayed padded leather rails to support the
arched body, along it's length

This was an interesting challenge.


I drilled and tapped the pick guard support bracket
for the pick guard that I fabricated.


This pickup bracket is fastened to the end of
the neck / fingerboard extension ...
allowing it to float over top of the solid
carved spruce top.

Above, is the compensated nut blank.

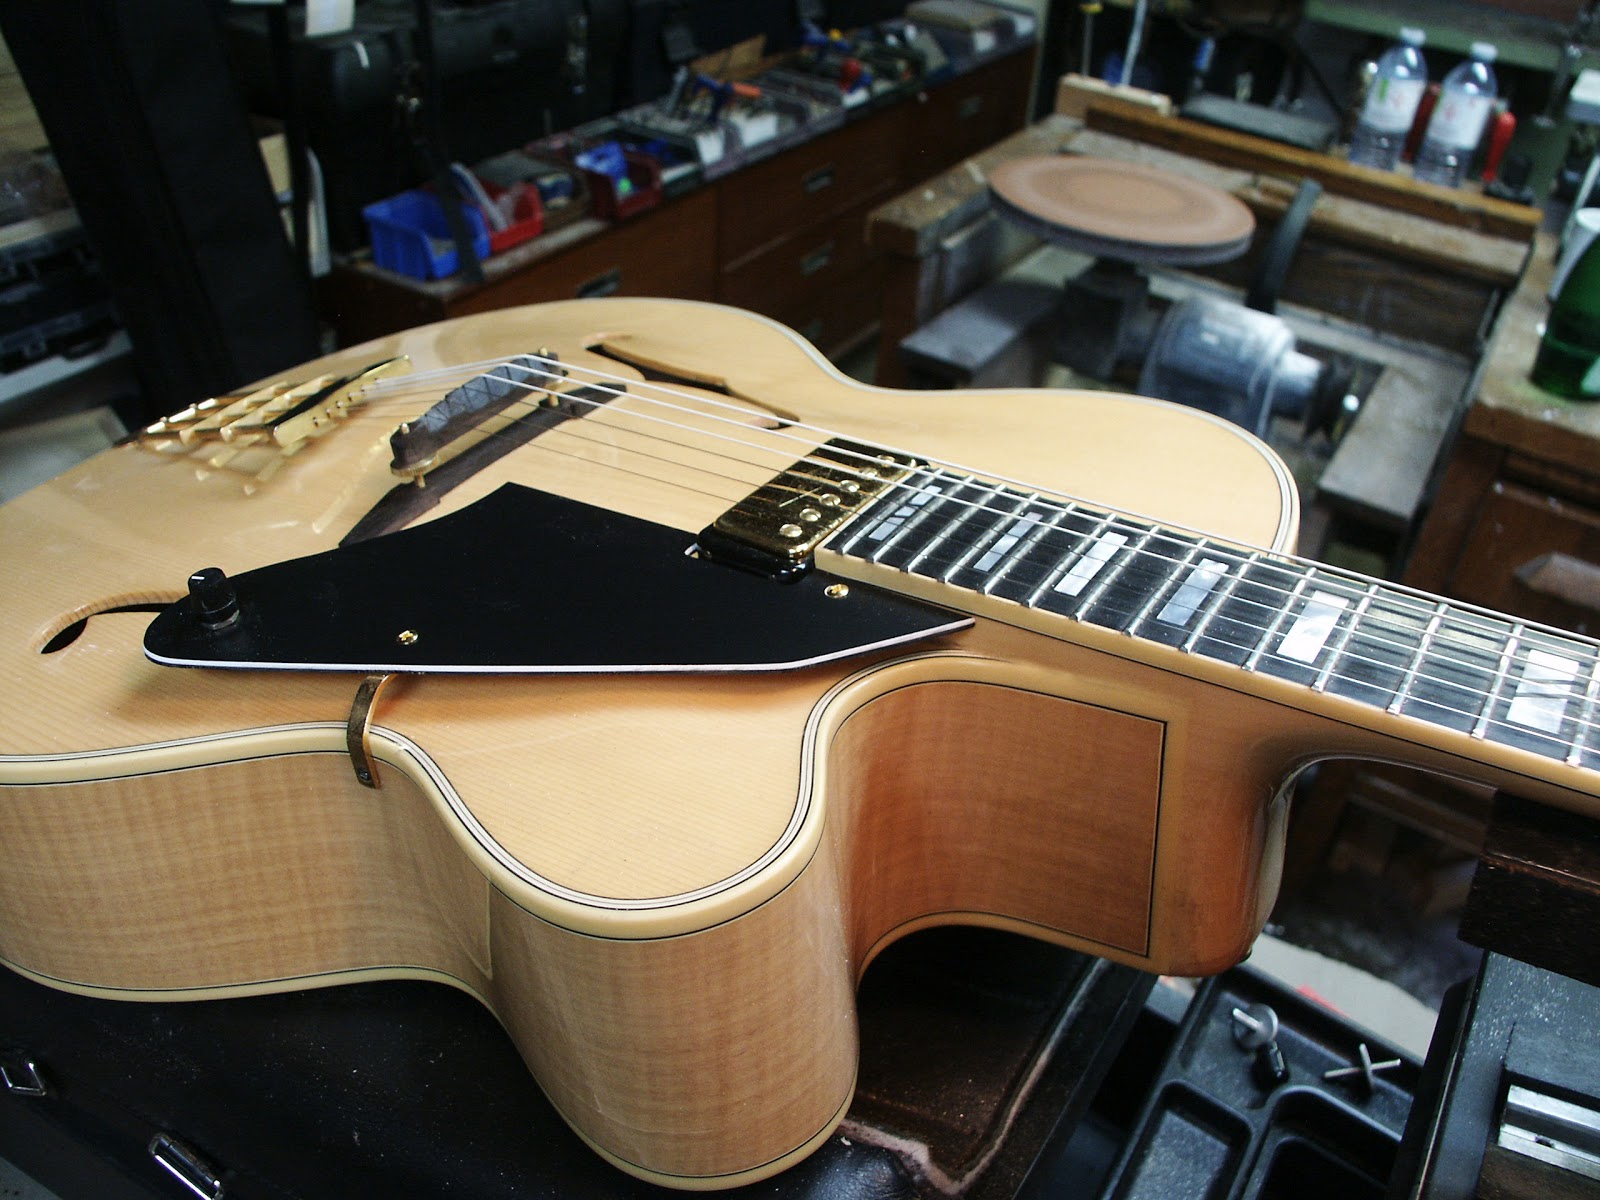
The original bridge was missing, when Shayne bought this
solid-carved-top, Hofner "President" guitar.
I used the ghost shadow
of the original bridge's "footprint"
as my template for making the
new bridge from a block of ebony.

Pretty labour intensive, but well worth the effort.

The radiused sander at the top of this post
( see video ) was used to cut the concave radius
in the foot of the bridge, to match the top curvature.
Duplicated the original foot,
then fitted it to the Arched top,
and fabricated a sculpted intonated bridge,
with a radius to match the fingerboard.

Guitar Tech Workshop
Magnificent Portuguese
12-String


Ibanez 7-String Universe
neck re-alignment, fret dress
and setup.

Left handed American
Strat Refret+ Comp nut.

Fret level re-crown and polish
on FreeNote 12-tone fingerboard.
Thank you Stratford and
Southwestern Ontario ! ... for
28 years of faith, trust
and encouragement.

59' Fender Precision


68' Gibson ES-175


This Martin Guitar was in for some loving' this week too !

busy week coming up .... stay tuned \m/ !
Guitar Build Class


 Peter finishing up his kerfing
Guitar Build Class

Lucas milling up some neck blanks.

Barry checking the final fit for top gluing.


I try my best to remember
to pull out the camera during class .....
but oftentimes things move so quickly ...


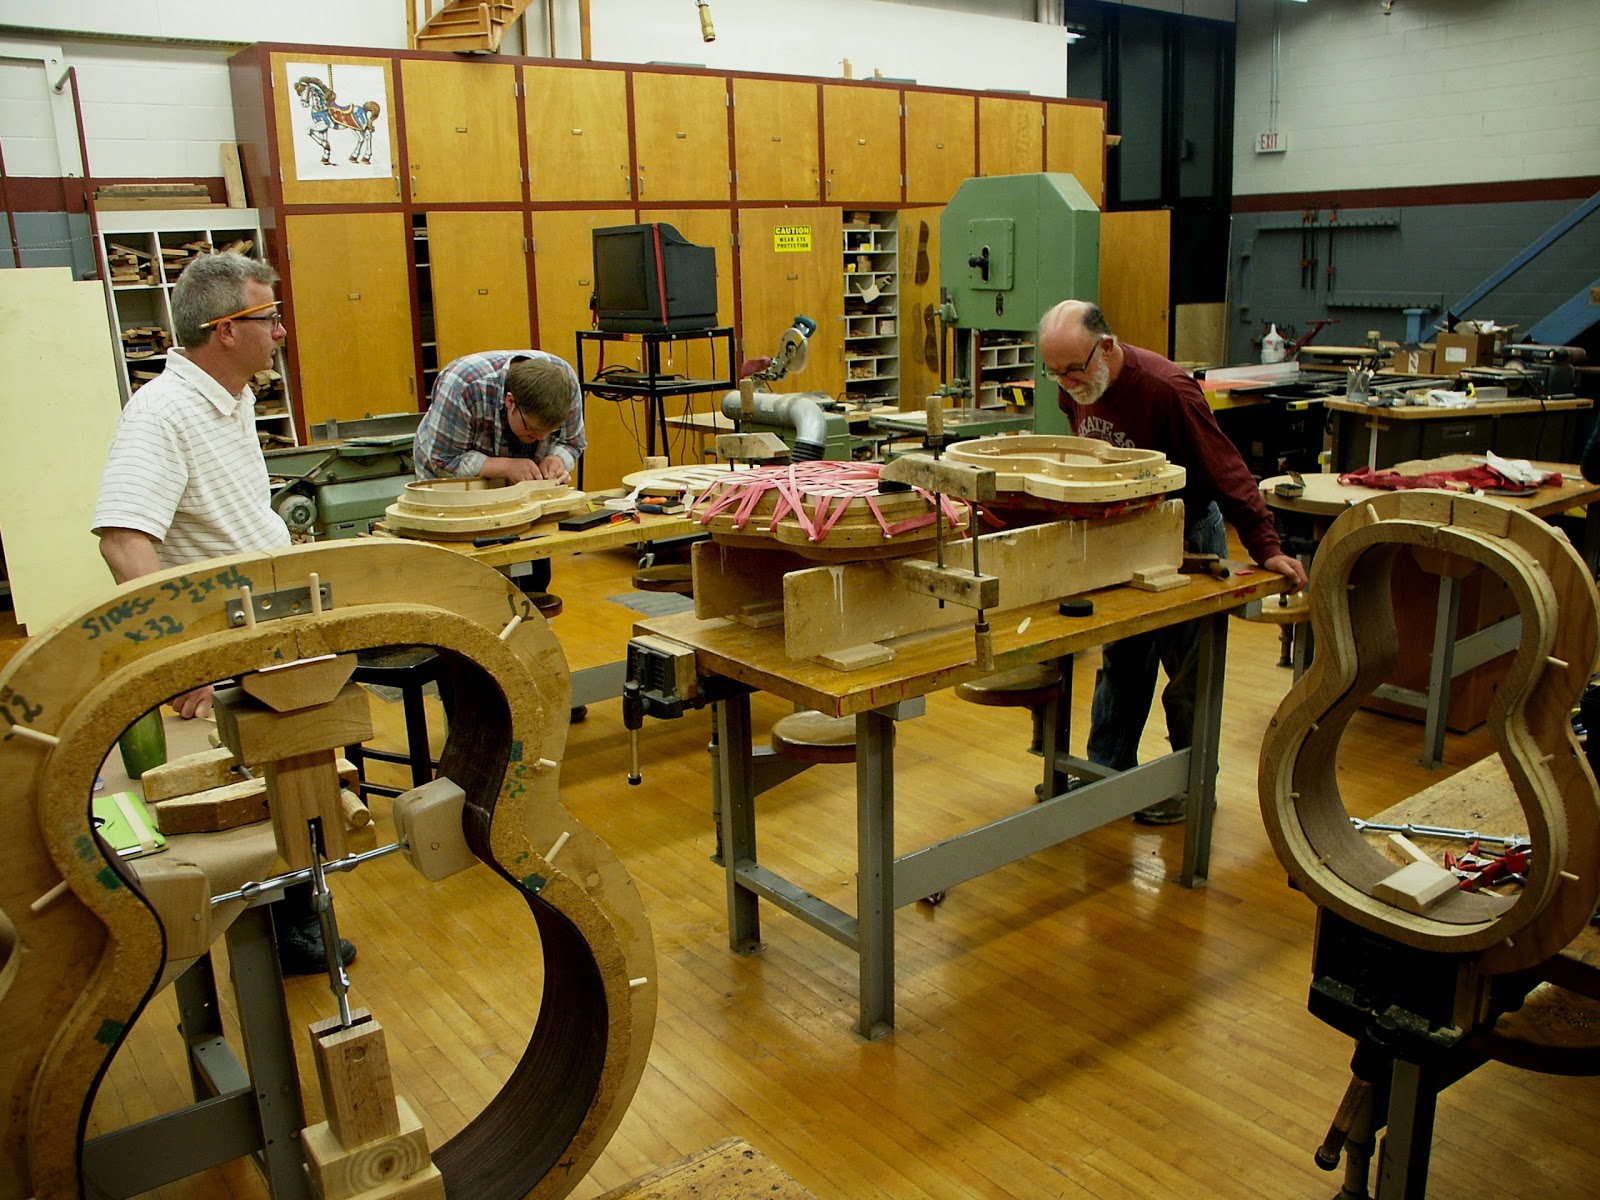


Over the course of a week .....
in my home shop
Martin / ( 3 ) Taylors / RainSong / ( 2 ) Normans
came in over the last few days, for fret dresses
compensated nuts and saddles .....
3 wireless systems installed for the
Stratford Festival's production of
the Sound of Music.
Above is another one of Robert Godin's ( many ) brainchilds.
Two of these were used for the 2015 Stratford Festival Season.
This ( above ) is a Kamouraska Cedar top Classical.
I modified the headstock to mimic an
18th Century "Panormo" style headstock
( sorry Robert .... but you did get the credit \m/ ! ) ....
Martin nut ledge, ready for a compensated nut.
A Rainsong carbon fibre guitar in for
a comp nut / fret dress and setup.
Prayer meeting, at the
Church of Guitarcheology.
I am SO proud of these guys !
Everyone is "getting it" big time .
Here are a few shots, for
David / Richard / Jody / Charles
4 more TechDeck owners ......
In my own workshop and in the College Classes,
I am continually developing faster / simpler / and safer ways
to "get the job done " ...... below are some new TechDeck manoeuvres,
for the "V" shaped, or unusual shaped guitars.
In this case, I'm cutting compensated nuts on all three of these guitars;
and doing complete a fret dress, as well as setting up the Floyd Rose bridges.
The TechDeck really helps you to make that
"jump to light speed "
in the repair department;
especially when it comes
to handling all of the
wild shaped guitars.
It was kinda' like a breathe of fresh air,
after doing all of
the wild shaped guitars this past week,
when Eric dropped of his Taylor
for a partial refret yesterday ;^ )
Tutorial filming continues ....
White Falcon neck re-set
+ 61 Fender Jazz restoration
A few shots from this past week
Loreena McKennitt's Trouabadour
Lyon+ Healy .....
3 Rosewood Parlours

End splice and dovetail cuts

Cedar top with spalted maple rosette ...


Loreena McKennitt's
"Story Behind the Songs "
Tour, kicked off in Ottawa.
Brian Hughes doing his sound-scape
multi-instrumental magic ..
Guitar-Synth / Oud, Bouzouki,
nylon + Steel string acoustic Guitars
This is further complimented, by a wonderfully
passionate Cello / Vocal / Wooden Recorder
( forgive me ... Her name escapes me ... but her music hasn't !! )
Loreena's main-stay, veteran
Jazz guitartist / multi-instrumentalist
Brian Hughes, had the pickup go down on
his A/E steel string ... just as they were
wrapping up rehearsals for this tour.
I've posted a play-by play pictorial for
my College students, on this last
minute " drop what you are doing "
"all hands on deck" guitar rescue lol !!
I'll go over this job in detail as we
kick off Level 2 next week.
Hey Michael,
Thank You, Thank You, Thank You !!!!!
I was very indifferent to that Tak, as I have a
lovely '64 Guild at my studio and the Tak was just a workhorse guitar
that I played a few songs on while on tour with Loreena.
I'm very happy that it went down last week so you could work
your magic on it !
Now it plays beautifully, intonation is perfect and it sounds Great,
I Love It and will be playing it more in the future !
Thanks you so much for turning it around so quickly and for
all the craftsmanship that you put into it, I really appreciate it
(and the pictures too !).
Now that I am thinking about it, I also have a Nylon String Tak
circa '87, same body style as the steel and a few years older.
I love this guitar. I took in last year to have some of the bracing
repaired (tour damage). When I got it back the volume balance
was off (low end nonexistent, high end present). I took it to another
Luthier and he solved the problem but I think the (single saddle) is problematic
as I had shaved it down 27 years ago and not perfectly. Just wanted lower action
as that is what I like.
We are back in Stratford on Oct. 27th until I depart to LA on Nov. 2nd.
If you have the time perhaps you could have a look at it.
Best Wishes,
Brian
All of theses guys had covered, or
exceeded, the price of administration;
with the money they have saved on
Guitar Setups and calibration ;^ ).
Patreon access to 300+Videos.
https://www.patreon.com/Guitarchitect
#freeguitarrepairtips
1957 Gibson J-45
Full Video Access to 300+ Videos
The Fall 2014 Session
Remember these ...?
The Fender Starcaster
Here are some more shots after
I finished the Setup / Fret Dress
and Compensated Nut.
Customer's response ....
I plugged her in when I got home and Holy S**t!!!!!!
Now that's a damn fine guitar!!!
It's totally changed the feel!!
Thank you for your Mastery Michael!
Terry
In the photo ( above ) ... you can see
how close the saddles are to the edge of the cast bridge !!!
I ended up flipping the "A " + "D" string saddles
in order to squeeze out enough "travel" to line up the
intonation ... a VERY close call .... !! ...
but in the end ( whew !! ) after a fret dress,
compensated nut and a bit of re-engineering
.... she's now, totally rippin' ;^ )
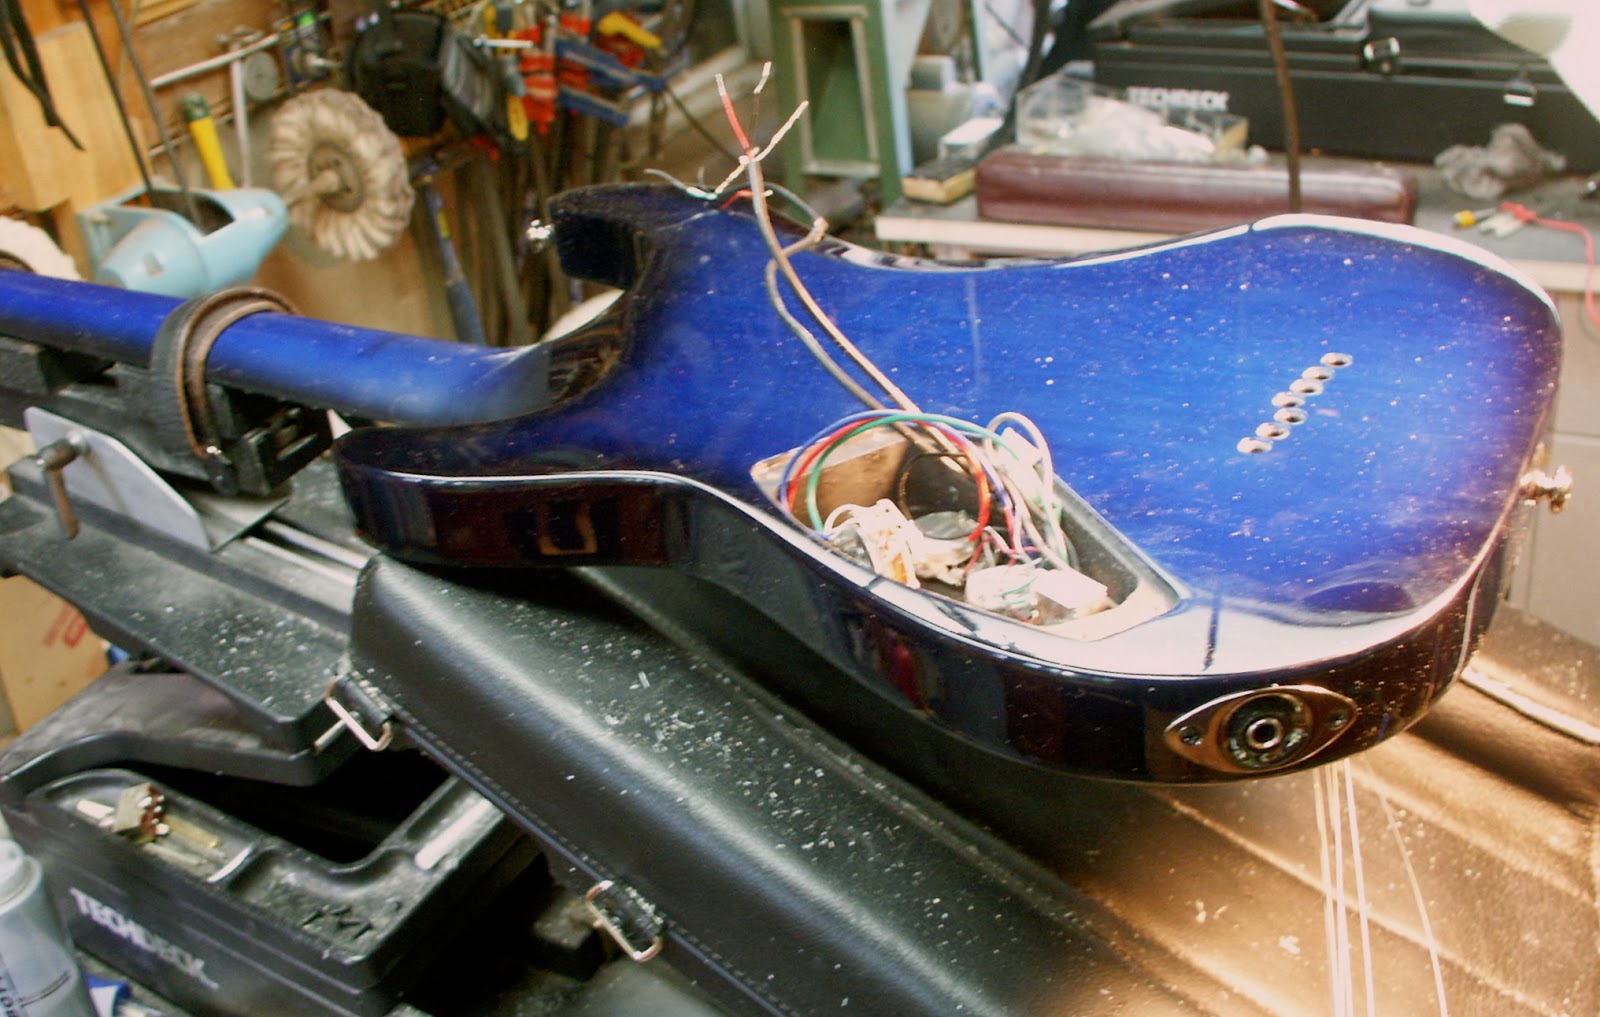
Re-issue Fender Starcaster
( Originally produced in 1977 / 78 )
This was a guitar that I built for a music student
of mine .... 16 years ago ....
He had a bit of a mishap at a party and tripped,
while the guitar was strapped on.
He ( and the guitar ) took a nose dive.
This resulted in a couple of nasty soundboard cracks
and some damage to the finish. While it was here,
I took the opportunity to install a compensated nut
and give it a good setup and ultra-tweak.
It plays and sounds better than ever now :^ ) !
Back from the brink of death ... lol !
I took a shot ( below )
for all of the TechDeck owners,
to illustrate this manoeuvre
..... ;^ )
I had another "Eureka Moment" with the TechDeck
as I was working on this Jumbo Guitar ...
I needed to do a "finish drop-in" on the edge of the waist.
The instrument needed to be held in
exactly the right orientation to allow the lacquer to
flow into the damaged area ... and be held in this position
for about 20 minutes as the finish "set".
Warren is really making some serious progress
on his nylon string Parlour Build.
Jordan's steel string parlour soundboard ....
has all of the braces radiused and ready for
install and paring next class.
Rob will move onto the fingerboard radiusing,
headstock details and binding-purfling detail,
for his Rosewood Parlour, over the next few classes.
PRS Pickup Swap
Gibson J-45
Custom Shop Strat
These are 18 shots that were posted at random ,
to give you a basic cross-section,
of some of the more interesting guitars,
that I've worked on, in the past 10 days ...
McConville Maple 12-String Body
1980 Laskin Cutaway
McConville Auditorium
Gibson J-200
ES 330
J-200
Reverend guitar ( above )
Installed 2 Duncan pickups / tone-pro bridge and posts
Compensated nut / sperezel tuners / Fret Dress + setup
Get the Full Video story
https://www.patreon.com/Guitarchitect
Please be as specific as you can about your photo requests;
as I literally have over
20,000 shots ( more with every passing day )
of repair technique photos
/ class photos / TechDeck photos / Neck Surgery /
Bridge slotting jig etc... etc...
Cheers,
Michael
( Below )
they quickly find out,
that wiring-in the new pickups,
is the smallest part of the job.
The liability is HUGE.
One small scratch on a
customer's guitar ...
and it's Game Over .
These two Schecter
7 String Diamond Series
guitars, were done in tandem,
as I upgraded to
"Bare Knuckles" pickups
from the UK.
I love being able to jack the guitar right up to "nose level"
as I wire-up the electronic components.
The guitar is held firmly in place, with leather padded
support, and genuine leather straps.
The wiring on these two guitars, was identical;
Volume / Volume / Tone ( with splitter )
and a 3-way selector switch.
During this procedure,
Both of these guitars were
flipped face up / face down
on their edge ( for access to both sides simultaneously ).
Oftentimes I am working on
"mint condition", or Vintage instruments.
Knowing that these valuable instruments
are always held safely, in the most
advantageous position, for
every single job I perform;
allows me to relax, breathe easy, and devote
my Full Concentration to the task at hand.
When spraying the pots, I flip the guitars on their edge
while they are plugged in and tuned, as I
rotate the pots while spraying to get maximum penetration.
All of these manipulations,
to get the guitars in the perfect orientation for the job,
are done in seconds; with quick, one-handed adjustment.
This takes a fraction of the time you would take,
if you were using dangerous clamps or vices.
Safely manipulating the guitar into
multiple positions, while feeding
wires through, carefully removing
stock pickups, and accessing
both the front and the back
of the guitar at the same time.
All of this is accomplished,
without out ever leaving
even the smallest scratch !
THIS is the biggest challenge.
GK-2 Synth pickup +
9V Battery Cavity
(BSJ /CCJ tutorial) Here are
a couple of unusual
TechDeck manoeuvers ...
When cutting out the 9v battery access cavity
on this Stratfordcaster ....
I strapped the guitar body, in reverse, face-down,
with the neck hanging out over the wider end
of the TechDeck.
I then lifted the body platform and gently
pressed the face of the guitar into the leather padded rails
with the two-footed clamps, while using the aluminum
"BSJ / Cavity -cutting Jig" to make the router cuts.
Att: TechDeckers ....
you can email if you have any
questions about this procedure.
I have organized a "Tour Pack"
TechDeck-in-a-flight-case,
for Pro-Guitar Techs
to take with them on the road....
A Big Thank You goes out to Rick Pietila,
Guitar Tech on tour with Boston ( Tom Sholtz )
at the moment / will be touring with
Peter Frampton in his upcoming tour ....
your heartfelt and very valuable advice
is much appreciated.
The fully loaded TechDeck is a
"Guitar Pro-Shop-in-a-Box",
that has a total dimension of
34"x 18"x 9" when packed up
in our custom designed
flight case.
Under the Body Platform we have :
Soldering iron / spool of solder / combo allen key set
mini phillips / mini slot screwdrivers / 3 straight-edges
nut driver set / Gibson + Taylor Truss rod wrenches
crescent wrench / fret levelling file / folding exacto-knife
mini side cutters / soldering iron rest
Under the Neck Platforms :
2 string winders / nut file set / crowning file
capo / feeler gauges
this is how I strap the guitar down in order
to bring the electronics cavity "right up to nose level"
when doing this type of work.
The headstock overlay on this Guild ( below ) Guitar guitar,
was pulling away at the very top of the headstock.
I strapped the guitar down to the neck assembly,
then flipped it up vertically so that the glue
would "wick "into the joint as I clamped it shut
with a couple of spring clips ....
If any of you TechDeckers have questions ... ask ...
and I will send a detailed photo pictorial to illustrate.

For those of you who already have your TechDecks ...
FYI: The screw that goes through the aluminum female rail
that is located on the underside of the top neck platform,
was turned until it protruded through the floor of the extrusion.
It then acted as a "positive stop" for the mating male aluminum rail
( located on the underside of the large aluminum U-channel ).

The above photo demonstrates how I "urge" the
guitar side up against the inside of the soft leather padded rail.
This rail acts as a "positive stop" as I skim down the rosewood bridge
with a block plane to lower the action on this Yamaha acoustic.
( Note: This is a quick fix for a less expensive guitar ...
the real way to take care of this is to re-set the neck angle ...
which would only be done on very valuable guitars ...
Vintage Martin / Gibsons etc ..)

The above photo demonstrates how I hold the guitar
when installing new tuners, or reaming out a headstock
in preparation for new tuners.

In this class, we covered 12-string / Tele
Arch-Top / Taylor / Martin / Guild
setup , partial refrets, fret dresses,
bridge saddles, bone nut, edge dressing
Now you can get all these details on Patreon
https://www.patreon.com/Guitarchitect
Brampton , Toronto, Cambridge,
London, Kitchener, Guelph. Hamilton,
Mississauga, Oakville .... and right here in
good ol' Stratford !
Good work guys !


The original heavy poly finish
was falling off in chips and hunks !
We decided to level the fingerboard surface
down to raw wood and refinish;
for the cleanest, most precise job


Complete refret with Dunlop 6100 fret wire.
Levelled fingerboard and refinished with padding lacquer.


Bass De-Fret:
Play by Play pictorial
on the partial de-fret.


This was a partial de-fret
for a customer from Denmark.

Len decided to leave the first 7 frets in
for slapping and popping in the lower register.

The solid brass inserts are the perfect answer.
This completely restores the neck stiffness,
that is lost when removing the frets !

Paul's Les Paul
fret dress, comp nut,
Lindy Fralin pickups.


Adrian's Octave Mando
This is a replacement bridge( brass and rosewood )
and tailpiece that I fabricated
from 5/8" square brass stock.
The original bridge and tailpiece were missing
when Adrian bought the instrument ( used ).

Washers were used for each string, to pull the return wind
away from the focal point on the saddles.


Yeager's Taylor

LTD Compensated locking nut.

Taylor comp nut.
Andrew's LP comp nut , fret dress
and setup for .011" - .049"

LP comp nut.


Gold Top LP for Paul Dymond


Brad's Schecter Diamond Series 7-String
After doing the comp nut / fret dress / setup /
and installing the Bare Knuckles pickups ...
Brad sent these texts ...
I LOVE LOVE LOVE the Schecter ... I have to say again
you've done an amazing job.
Oh ya that compensated nut has opened a new world;
I can tune my Schecter way down to f# or G and
it stays in perfect tune
it stays in perfect tune
simply epic lol !
After picking up his Ibanez ( 3rd Guitar )
with the compensated nut.
Thanks for all the comp nuts!!!!!
I can't believe the work you do Mike!
The ibanez plays like a new guitar!
My mesa says thank you lol
Brad
After picking up his Ibanez ( 3rd Guitar )
with the compensated nut.
Thanks for all the comp nuts!!!!!
I can't believe the work you do Mike!
The ibanez plays like a new guitar!
My mesa says thank you lol
Brad


Brad sent a text the following day after checking it out .....
By the way the LTD is set up sooo good I can't put it down!!!!


You can now strum G-C-D to your
hearts content on this LP .
All of those first position chords now
play perfectly in tune.