
mcconvilleguitars@gmail.com


Update:
Several years have past since I put up this post.
Although this job was completed flawlessly ...
The setup time on this Gibson Hummingbird,
was a couple of hours start-to-finish.
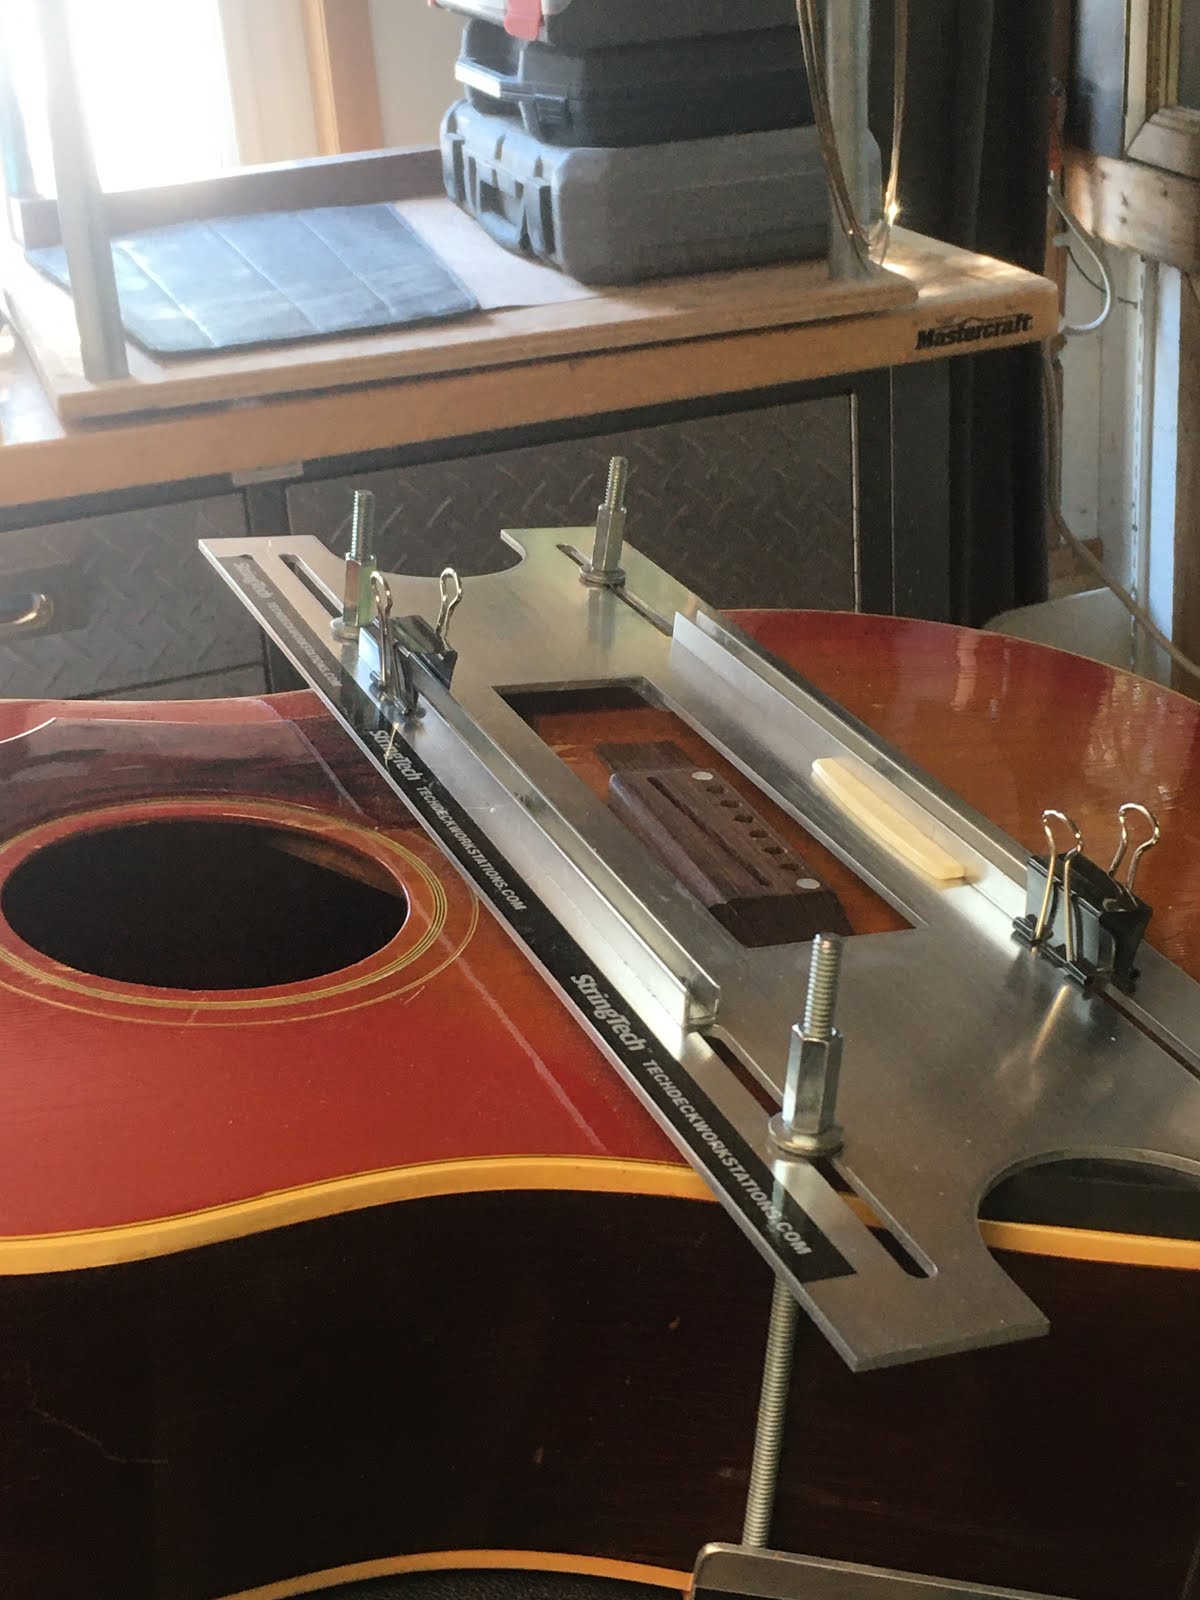
With the TechDeck and the new Bridge Slotting jig
this job has been reduced to 12 minutes ;^ ) ...
This setup works very slick.
This job was done in one of my Level 2 Classes
as a tutorial for my students.
Bruce Kirkaldy sent this one ( below )
up from San Diego California for some restoration work.
Thanks Bruce! ...
for giving me the opportunity
to bring this old gem back to life !
I have a strong hunch that this Ol' Girl
sat in the case with that broken bridge
for a good 30+ years.
I added the rosewood bridge pins,
figurin' it was about time to
dress the Grand Old Gal up
and take her out to the ball.

This press-fit sandwich of bone and rosewood
replaces the original bolts and fasteners.
I left the brass body inserts in the top
so that if someone wanted to put
the original adjustable contraption back in
.... be my guest !
 This press fit replacement delivers the string force directly to the sound board surface, more like a typical ' Martin ' style bridge
 What does that mean for the sound ? ......... Well it pretty well means a lot more of everything !
More bass more treble more projection more sustain more volume and a lot more stability!
 Fret level /re-crown /buff on those upper frets
If you look closely at the bone and rosewood sandwich insert .... you will see that I have decreased the pitch of the angle from treble to bass in order to tweak the intonation more precisely.

Get a load of this case ! Go on .... blow up the picture and take a real close look.

 I did NOT through cut the channel like the original bridge. I decided to leave a floor of rosewood at the bottom of the slot for a little more stability.
After the bridge was glued on, I "connected the dots" with a 1/4" router bit to form the wide channel for the fasteners and insert.

The first two holes I drilled, before I started to cut and carve the 7" x 1 1/2" x 1/2" block of rosewood .... were the centering holes for the threaded brass body inserts.


